The smell of cookies is in the air at our Training Center in Schieder-Schwalenberg. Normally our trainees and dual students work here in our own training workshop.
The smell of cookies is in the air at our Training Center in Schieder-Schwalenberg. Normally our trainees and dual students work here in our own training workshop. More than 70 junior employees start their professional life at Phoenix Contact every year. At the moment, most of them are at vocational school or university or work mobile from home. The few people who are currently working on site therefore curiously stretch their heads out of their offices. Have they smelled right? Did anyone actually bring cookies? The scent trail leads to the office of the Junior Business Unit, our junior company of trainees and dual students. And indeed: there is a tin of cookies on the table. But wait a minute, what is that symbol on the cookies?
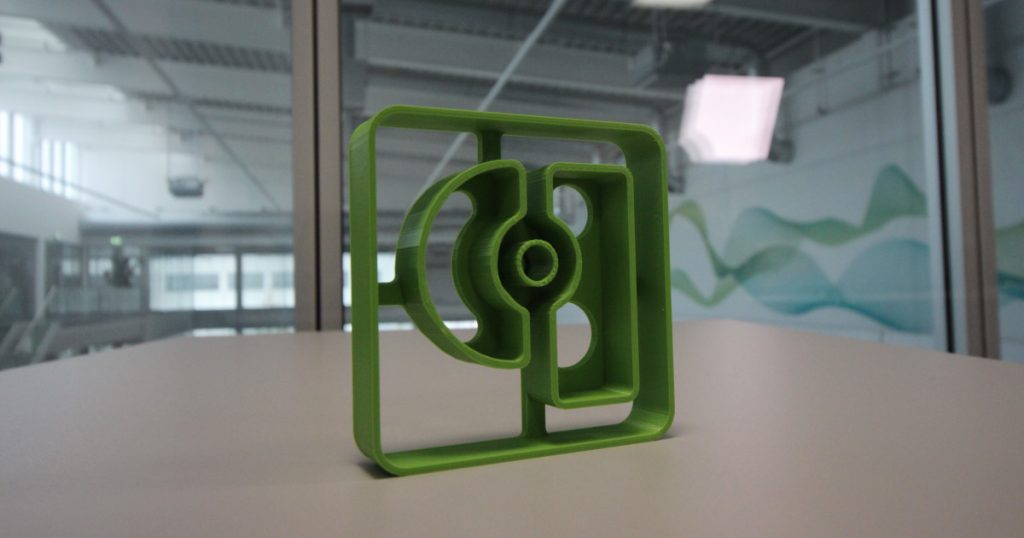
“For a digital Advent calendar on our Instagram account of the training we wanted to bake cookies in the shape of the Phoenix Contact logo,” says Florian Reinicke, who is completing his training as an industrial clerk. “We then very quickly decided to produce the cookie cutter in the 3D printer. We have our own in the training workshop. So we needed an expert in 3D printing.
A P from 3D
Marc Strathmeier is currently in his 3rd year of training to become a technical product designer. During his apprenticeship he learns to create and modify 3D data sets and documentation for components and assemblies using technical software. “Fortunately I already had a CAD file of our logo in 2D”, says Strathmeier. CAD stands for computer-aided design and refers to the technology for creating designs and technical drawings with the aid of a computer program.
“To make the whole thing three-dimensional, we first had to consider whether we wanted to cut out the logo completely or just emboss the contour on a cookie. Because of the filigree connection of the circle in the middle of the ‘P’, we decided on the second option.
The next steps were to determine the depth of the embossing. In addition, the shape had to reflect the logo in a mirror image. “This is the only way the logo will be right on the cookie afterwards.”
Strathmeier then loaded the finished model into the 3D printer. The printer uses the Fused Deposition Modeling process for printing. “The process involves feeding a roll of plastic wire wound onto a print head where it is heated,” explains Strathmeier. “The print head then travels along the contour of the 3D model and builds up the product layer by layer. In the case of the cookie cutter, the layers are 0.2 mm thick. After four hours, the mold was printed and Marc Strathmeier passed the baton to the baker.
Knead, prick, bake, decorate
Not quite at baker’s hours, but with 8 o’clock in the morning Michelle Lührsen juggled with butter, sugar, eggs and flour in the local kitchen. After four hours the work was finished. 25 chocolate cookies were perfect, “my family was happy about the rest,” said the budding industrial clerk with a smile. When the official task of making the cookies was completed and the photos for Instagram were in the box, the trainees on site were delighted with the sweet snack. And instructor Sebastian Gerhardinger was also allowed to taste. “He just spoke with instructor Marion Dittrich via Microsoft Teams. She worked mobile and was very envious that she could not try our corporate cookies.
Stefanie Theil


